
The Door Project
 All Classroom Lessons

by Rosemarie Dyer
Rosemarie Dyer has taught for almost 30 years, primarily in kindergarten and first grade. She taught this activity, in which children collect information about the doors in the school, to her first-grade class in the Warren Consolidated School District, located in suburban Detroit. The lesson gives the children experience recording, organizing, and interpreting data and also helps develop their number sense.
I asked the children in my first-grade classroom if they saw any differences in the two doors located in our classroom. Alex quickly noticed that only one door had an exit sign. Terri said that one door had a skinny window. Several more hands went up, and the children listed other differences in the classroom doors, including which had locks, kick plates, windows, and paper decorations.
The class and I then took a walk down the hall and looked at doors. The children noted additional differences: handicapped-accessible doorknobs, flags, hooks, numbers, latches, colors, name plates, and wreathes.
When we returned to the classroom, I told them that they’d each take another trip to look at doors, this time with a clipboard, paper, and a pencil to record their observations. I gave each child one attribute to look for and record. I told the class, “After everyone has a turn, we’ll share the results and make a class chart to show the information you recorded.”
We then discussed how to record their findings. “You could make a little picture of each window you find,” suggested Stacey.
“Could you make a checkmark?” asked Richard.
I assured the children that there were a number of ways that they could record. “What’s important is that your recording allows you to count how many you saw,” I told them.
I created several teams so that the children would go in groups and everyone was sure to have a turn. Before a group left the room, I gave each child a picture of the attribute he or she was going to count.
The first group returned with their results recorded in a variety of ways. One child used tallies in the traditional way. Another made tally marks but didn’t use the horizontal line to note a group of five. One child made tally marks with a horizontal line for the sixth tally, making groups of six. Others used stars, Xs, and triangles to note their findings. (See figures 1 and 2.)
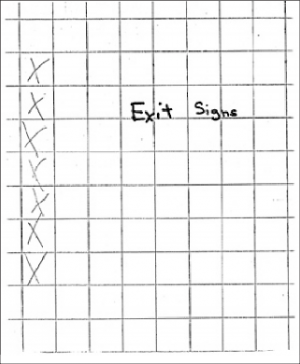
Figure 1: Carla used Xs to indicate how many
exit signs she counted.
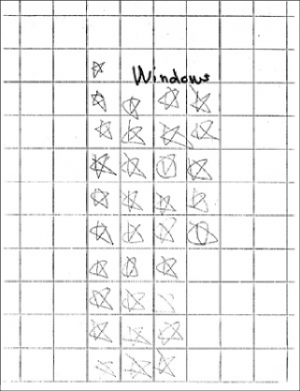
Figure 2: Lucy recorded the windows. She
counted by drawing stars.
After all the teams had worked their way through the school, I asked the children to count all of their marks and write their totals on Post-it Notes. When Leslie said she found one hundred windows, some of the children thought that was too large a number. I told them that all of the results would be accepted since this was the first time we tried an activity like this. I noted that some children had trouble accurately counting or recording their numbers while others were asking themselves if their findings made sense.
When the children had finished writing their totals on the Post-it Notes, I drew a horizontal line across the chalkboard and marked 0 at the left end and 100 on the right end. I asked the children to put their numbers on the line. “Where on the line?” asked Kevin.
“Put it where you think it should go and move it if it doesn’t fit with its neighbor,” I replied. “What do we do with two sevens?” asked Daniel when he went to post his number.
“You can put yours above the other seven,” I said. It took some adjusting, but eventually the numbers were on the line, in order, although the spacing among them wasn’t accurate.
I asked the class, “If we were going to count by tens, where would the tens be?”
Gordon said, “Fifty would be in the middle because it’s half of one hundred.” I used chalk to mark 50 and then asked eight children to stand where they thought 10, 20, 30, 40, and 60, 70, 80, and 90 should be. With suggestions from their classmates, the children placed themselves.
The next day I asked the children, “Is there another way we can show our information?” The children already had many experiences with a variety of graphs, including pictographs, bar graphs, and line graphs.
“We could use our links and make chains for each number,” suggested Erica. Several children began counting and connecting links. Since some of the chains were rather long, they went out into the hallway to complete the activity.
“We could make little boxes for each thing and glue them on a big sheet of paper,” offered Alan. I took out some graph paper with one-inch squares. “That’s not going to be enough squares. Can we tape the papers together?” Alan asked. Once they taped their papers together, the children began coloring in the squares for two flags, five doors that were not brown, five banners, twenty-two kick plates, thirty-two doorknobs, fifty-seven locks, and one hundred windows.
When we talked about the activity, many of the children felt the best part of the project was going through the school with a clipboard to record what they found.
From Online Newsletter Issue Number 5, Spring 2002
Comments